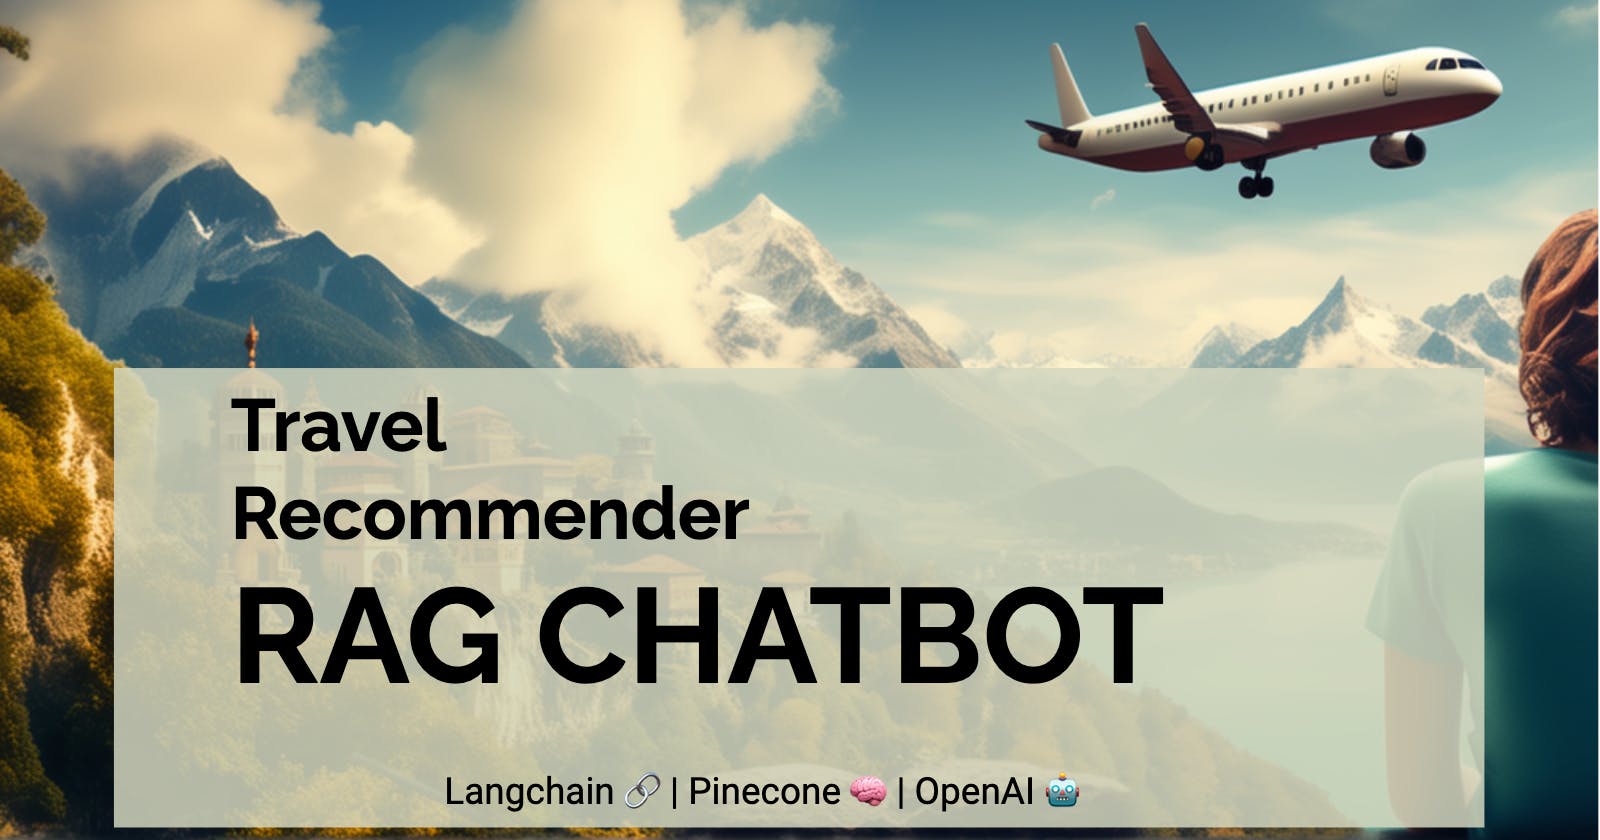


Introduction
In this blog, we're going to create a Travel Recommender RAG Chatbot using Langchain JS, Pinecone, and OpenAI. This chatbot can instantly find and answer travel-related questions from users. I've included an image below to show what our bot will look like.
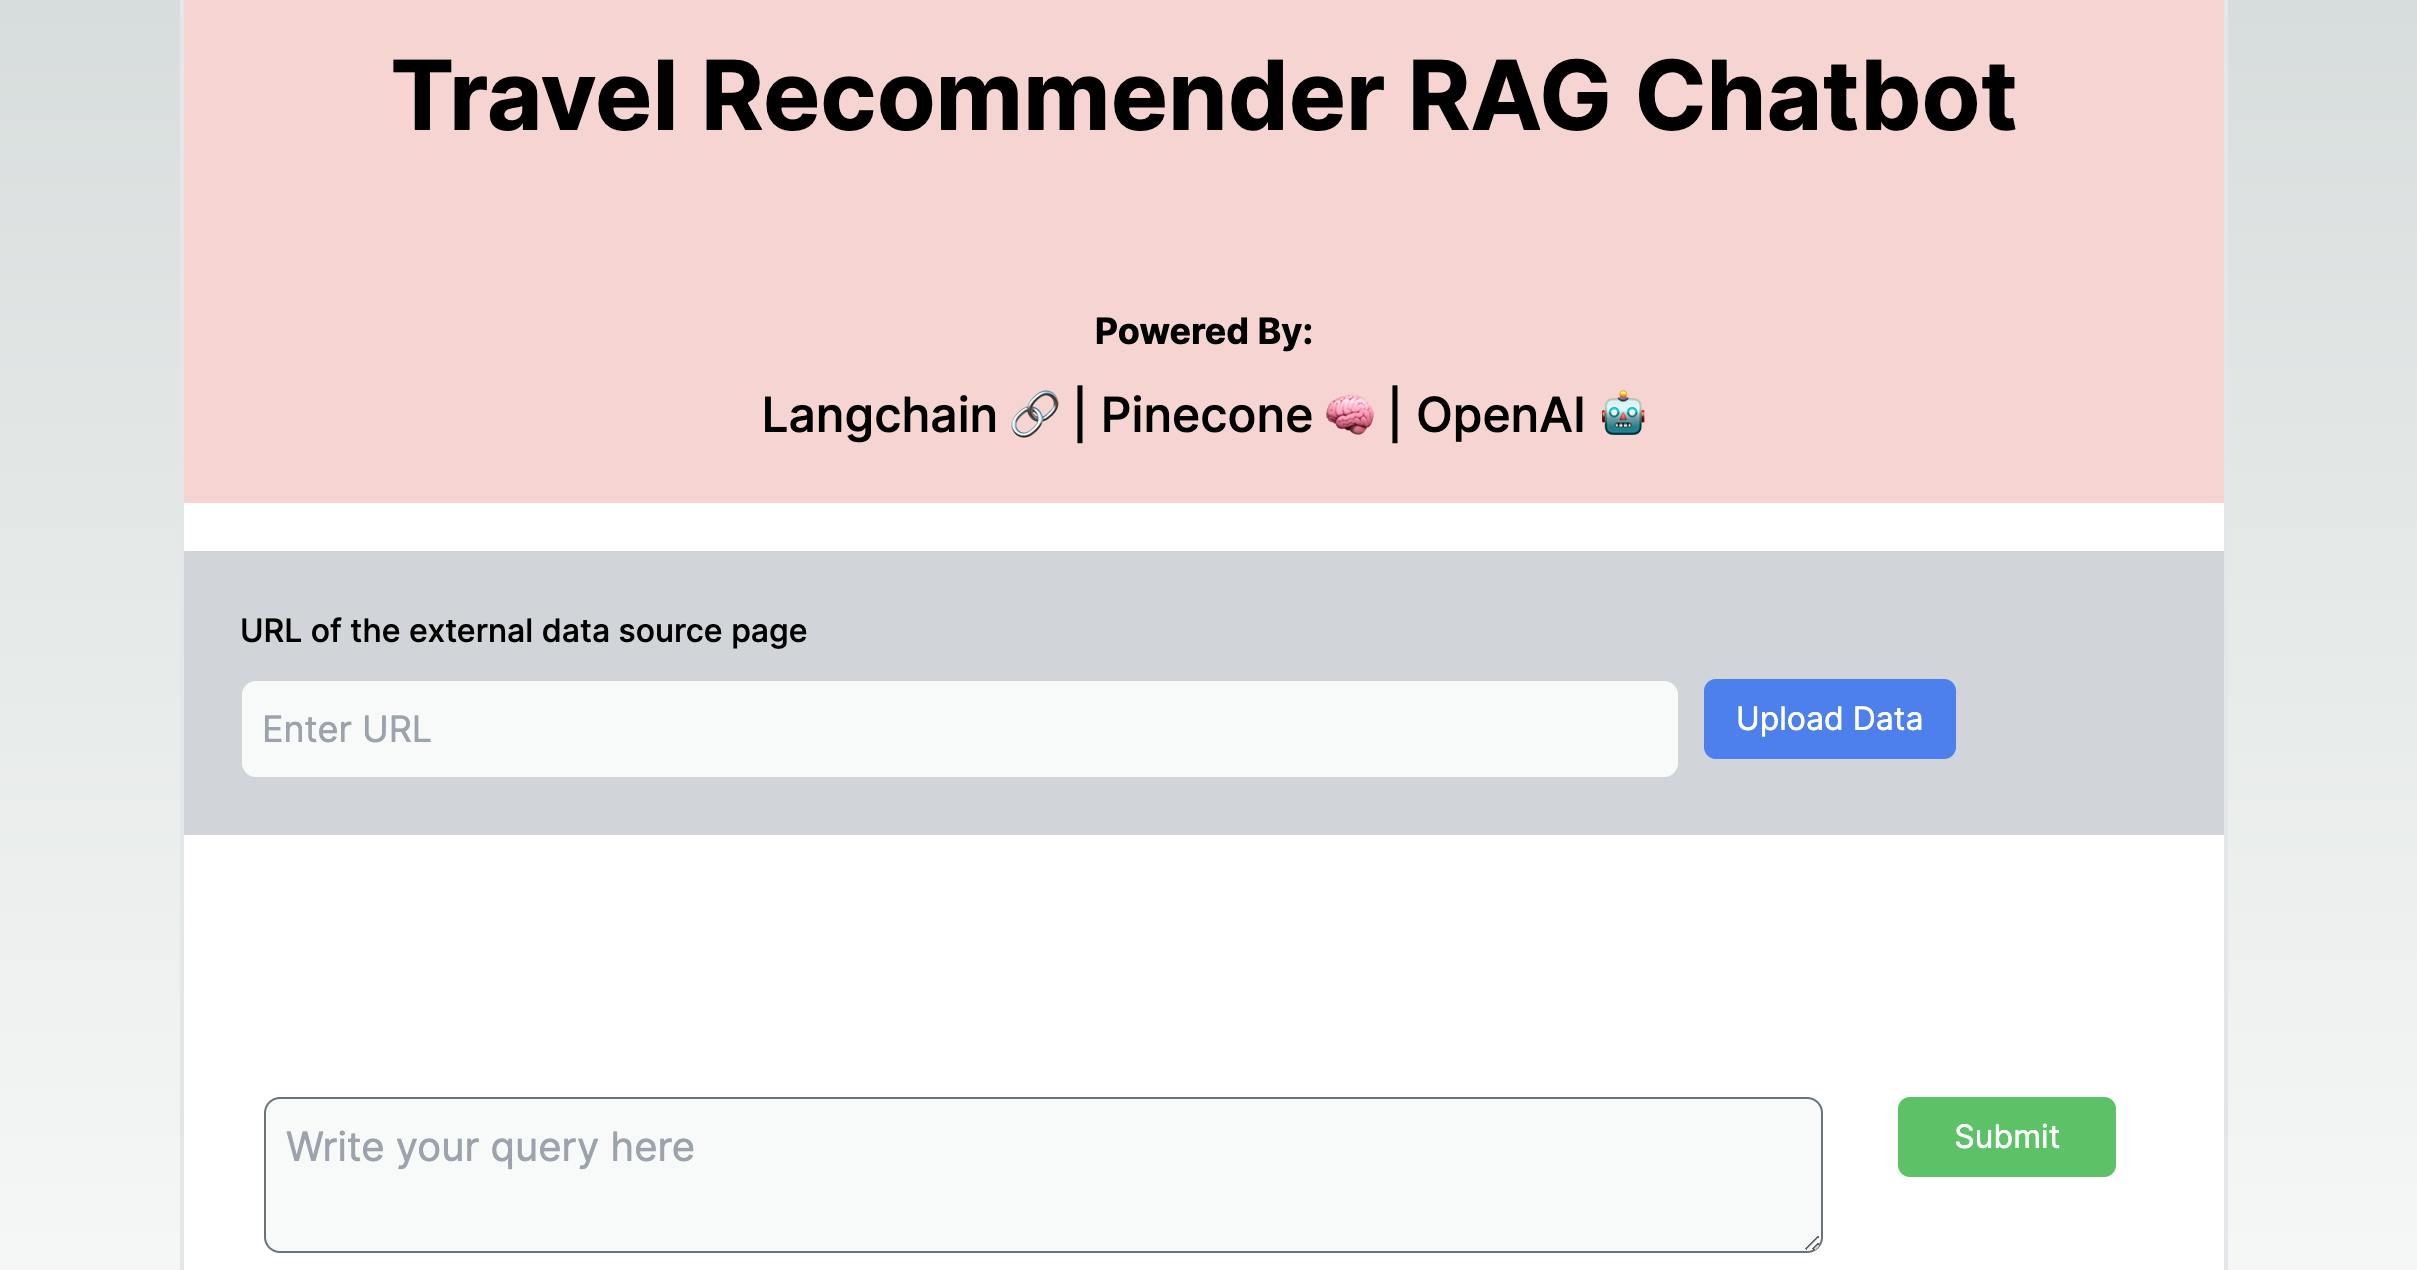
We've added a text box where users can input the URL of an external data source. When users enter the URL and click "Upload Data," the application will grab the text from the external webpage and insert it into the Pinecone DB. Once the text is inserted in Pinecone, users can ask questions in the chat by typing them in the query box below.
The text from the external webpage is converted to numerical representations using OpenAI embedding model before inserting into the Vector DB. Embedding is the process by which text is given numerical representation in a vector space.
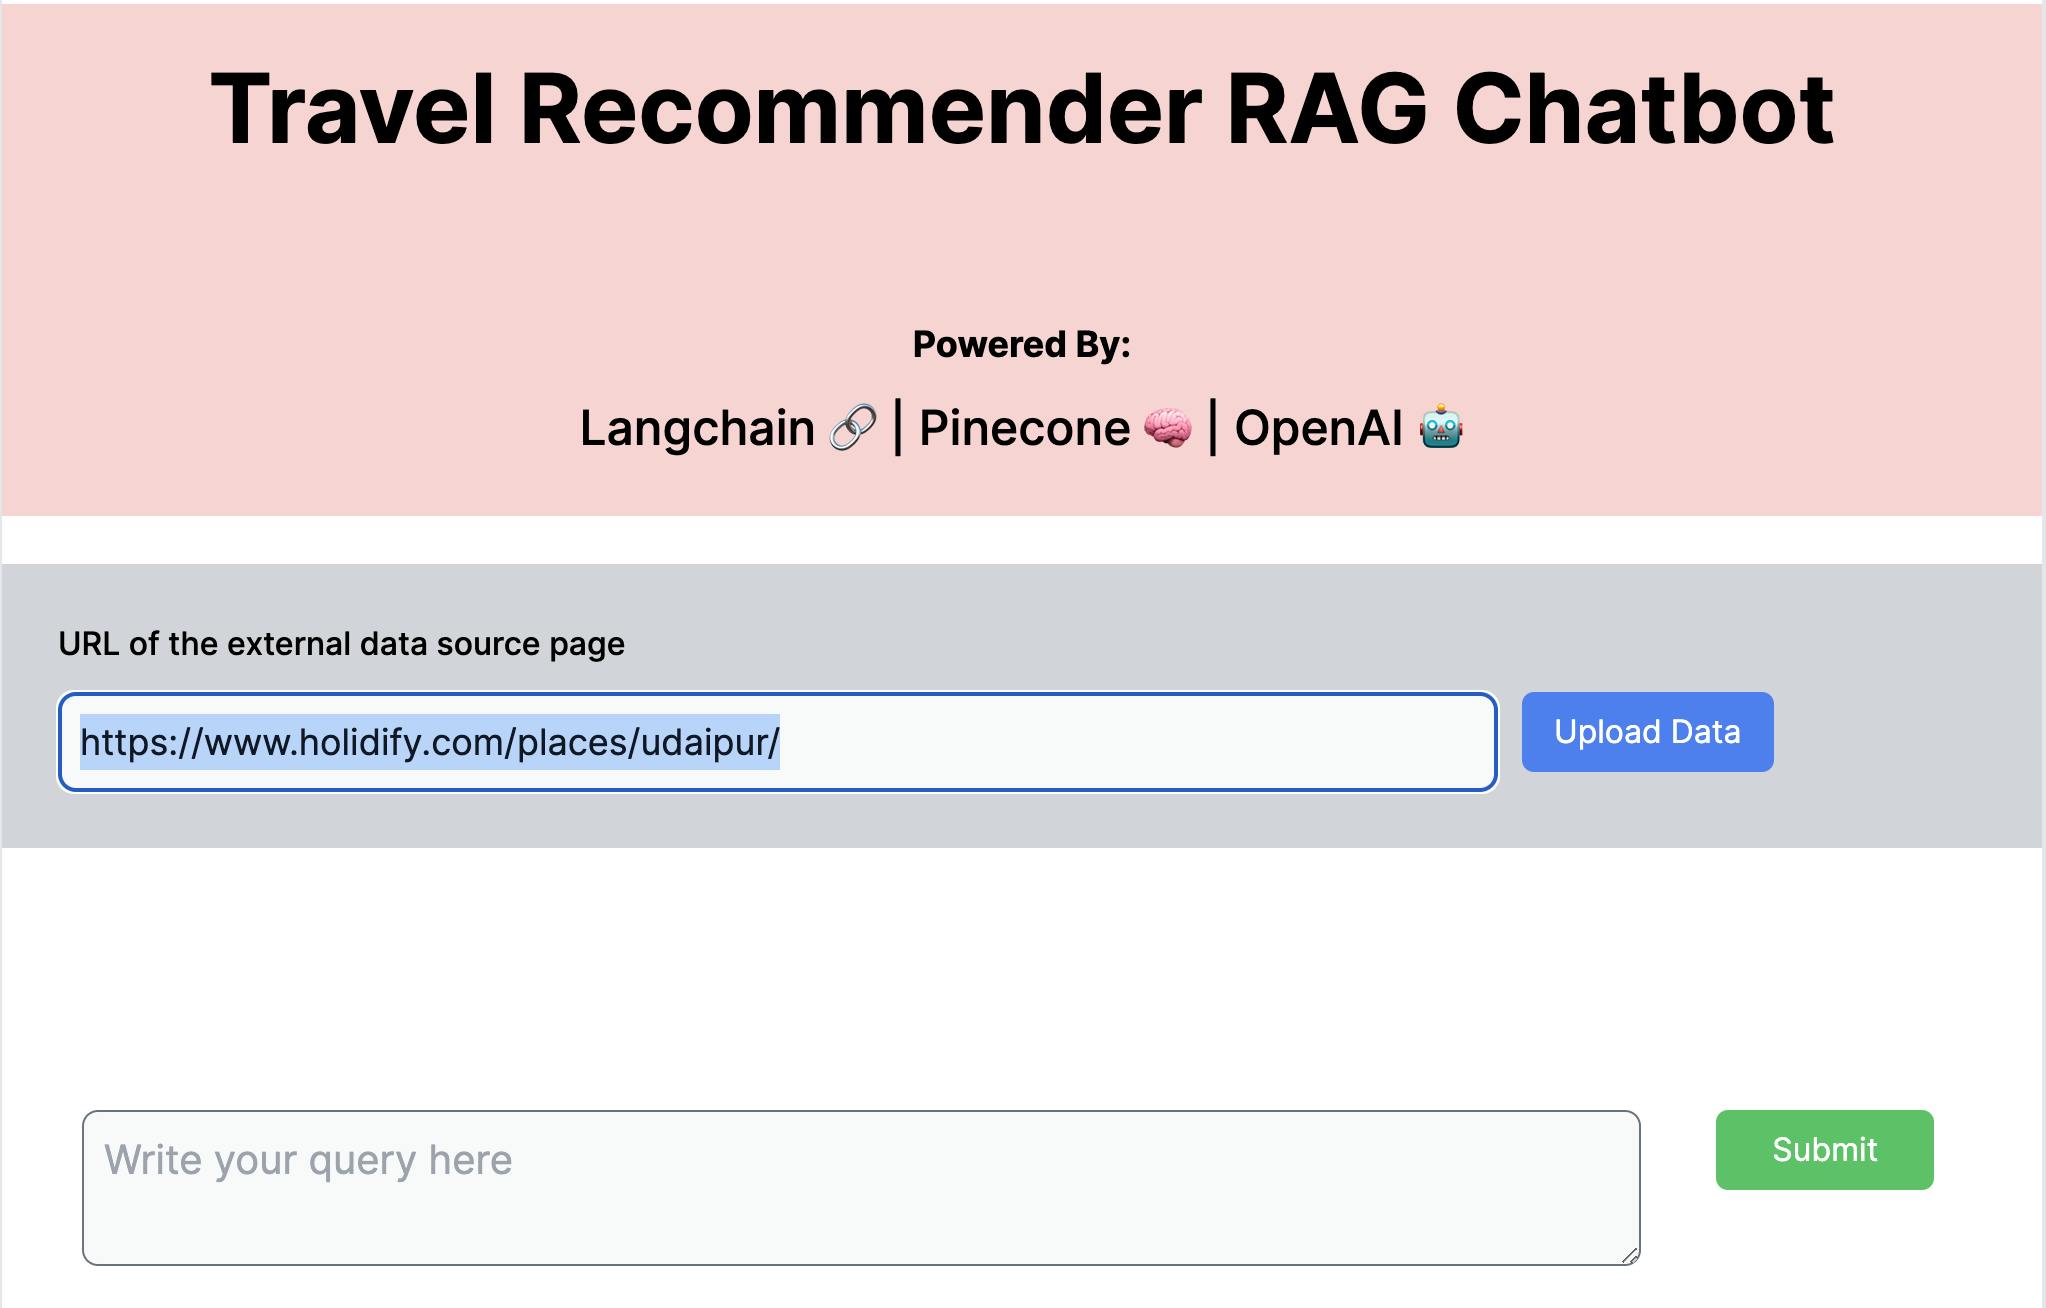
To collect details about tourist places in various cities, I'm scraping information from https://www.holidify.com/. Let's see how we can upload tourist places information for a specific destination to the Pinecone DB. In the following example, I've scraped information about tourist places in the lovely city of Udaipur, India.
In the external data source URL textbox, we need to enter the URL (https://www.holidify.com/places/udaipur/) and click the Upload Data button as shown in the screenshot below.
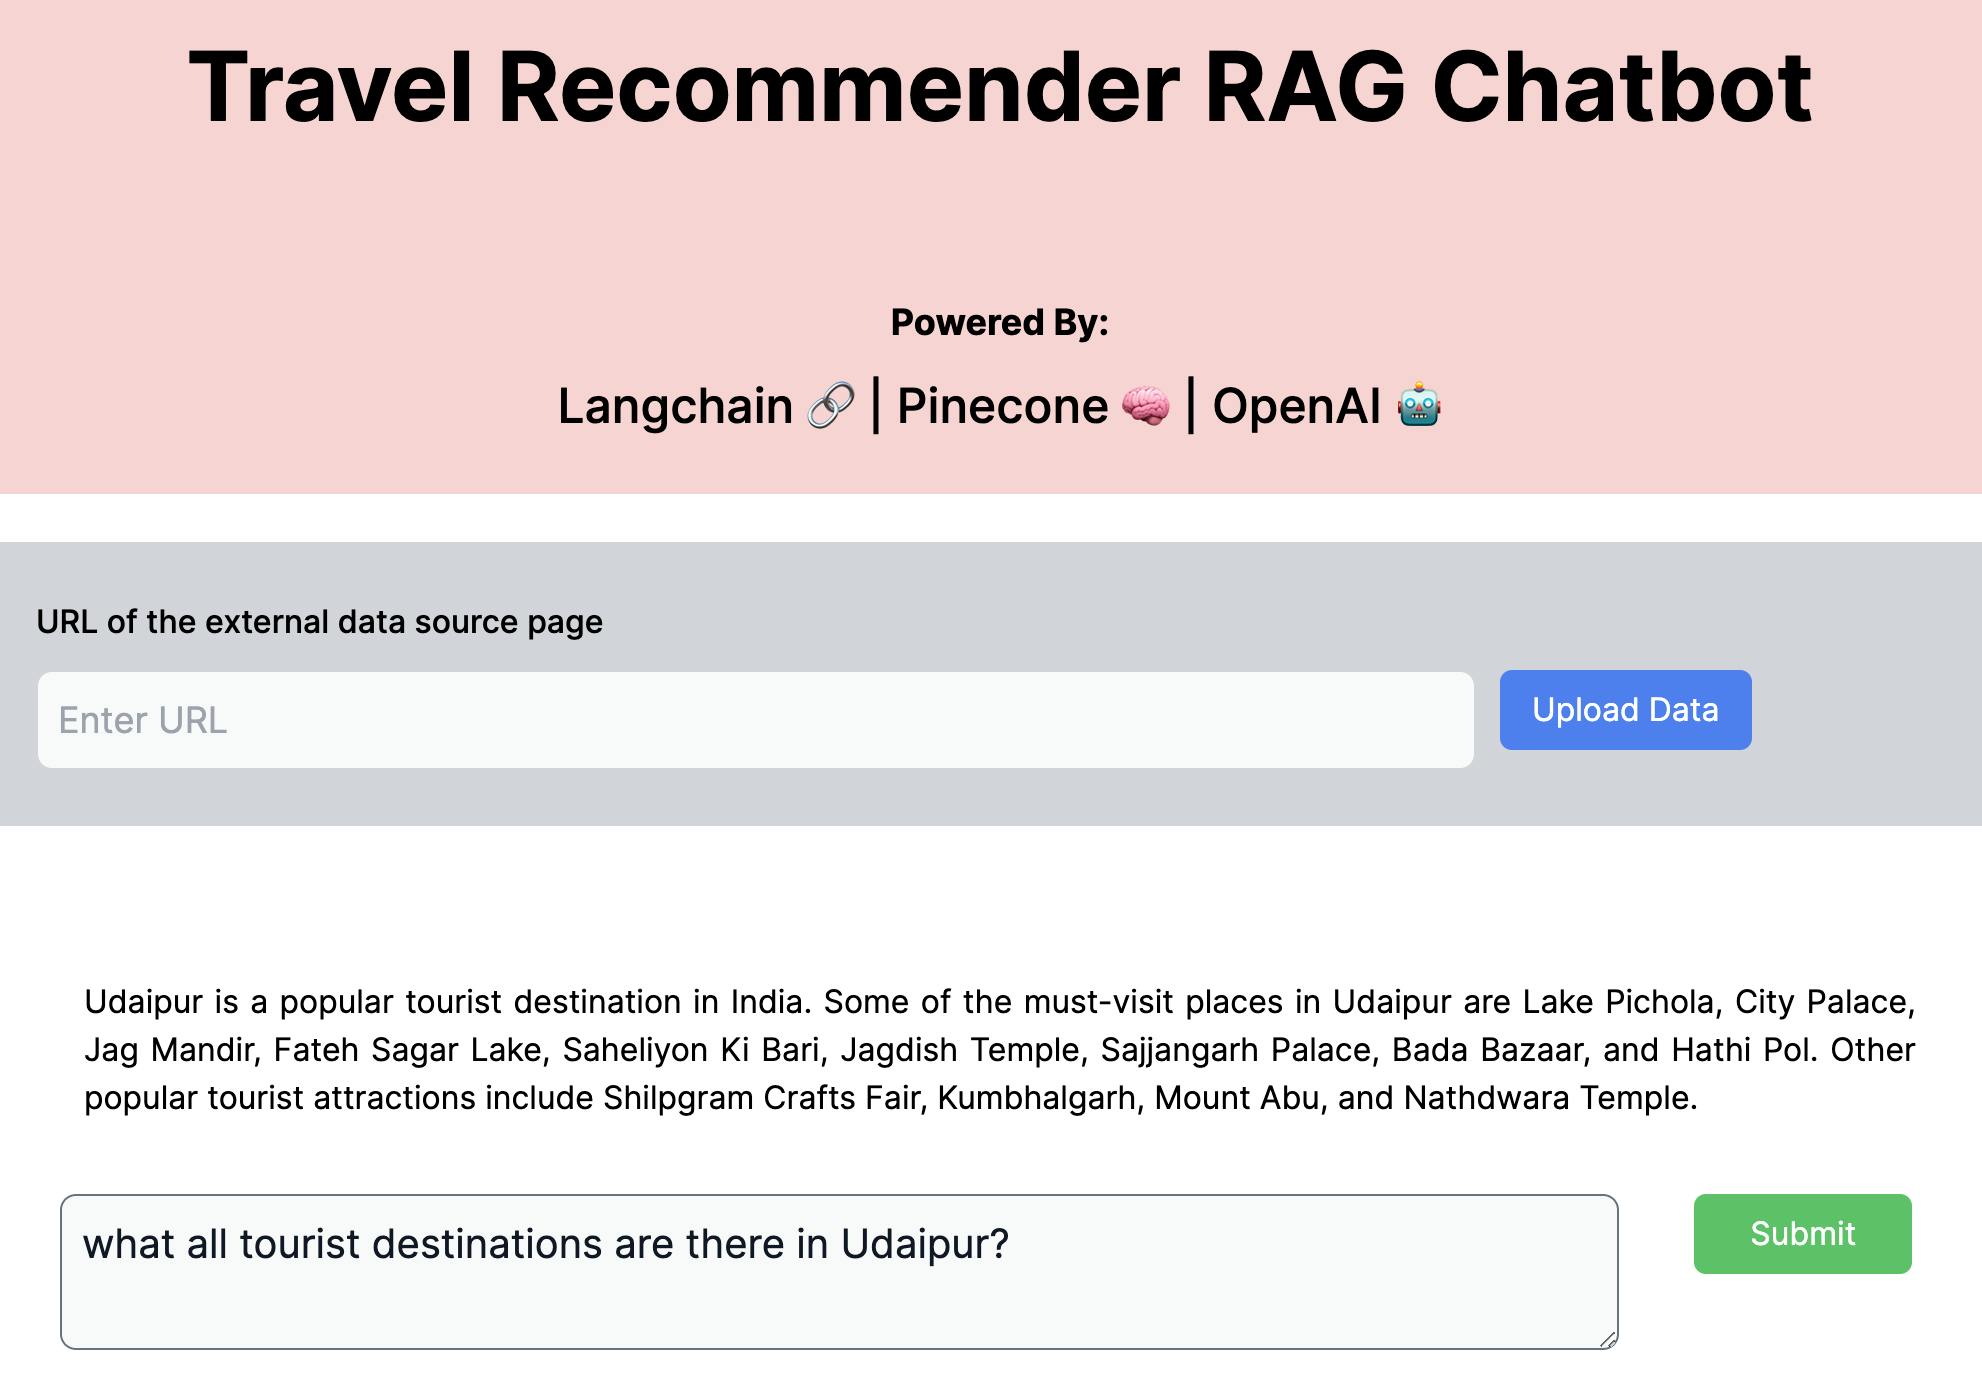
After we've uploaded the information to our Vectorstore, we can ask questions from our application. For instance, I asked:
What all tourist destinations are there in Udaipur.
And it returned this information:
Udaipur is a popular tourist destination in India. Some of the must-visit places in Udaipur are Lake Pichola, City Palace, Jag Mandir, Fateh Sagar Lake, Saheliyon Ki Bari, Jagdish Temple, Sajjangarh Palace, Bada Bazaar, and Hathi Pol. Other popular tourist attractions include Shilpgram Crafts Fair, Kumbhalgarh, Mount Abu, and Nathdwara Temple.
Travel Recommender Chatbot In Action
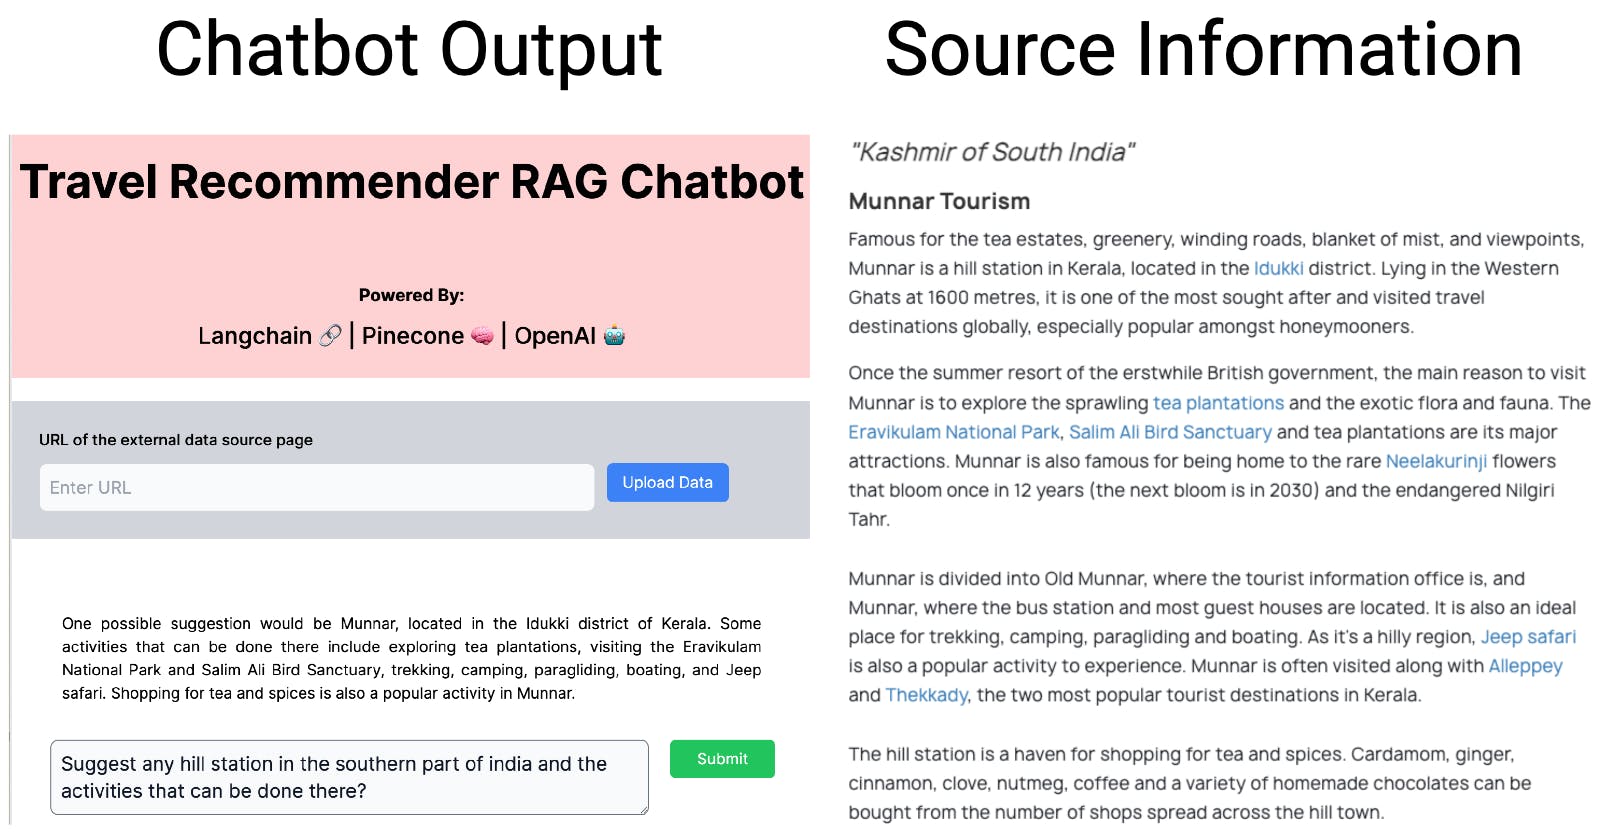
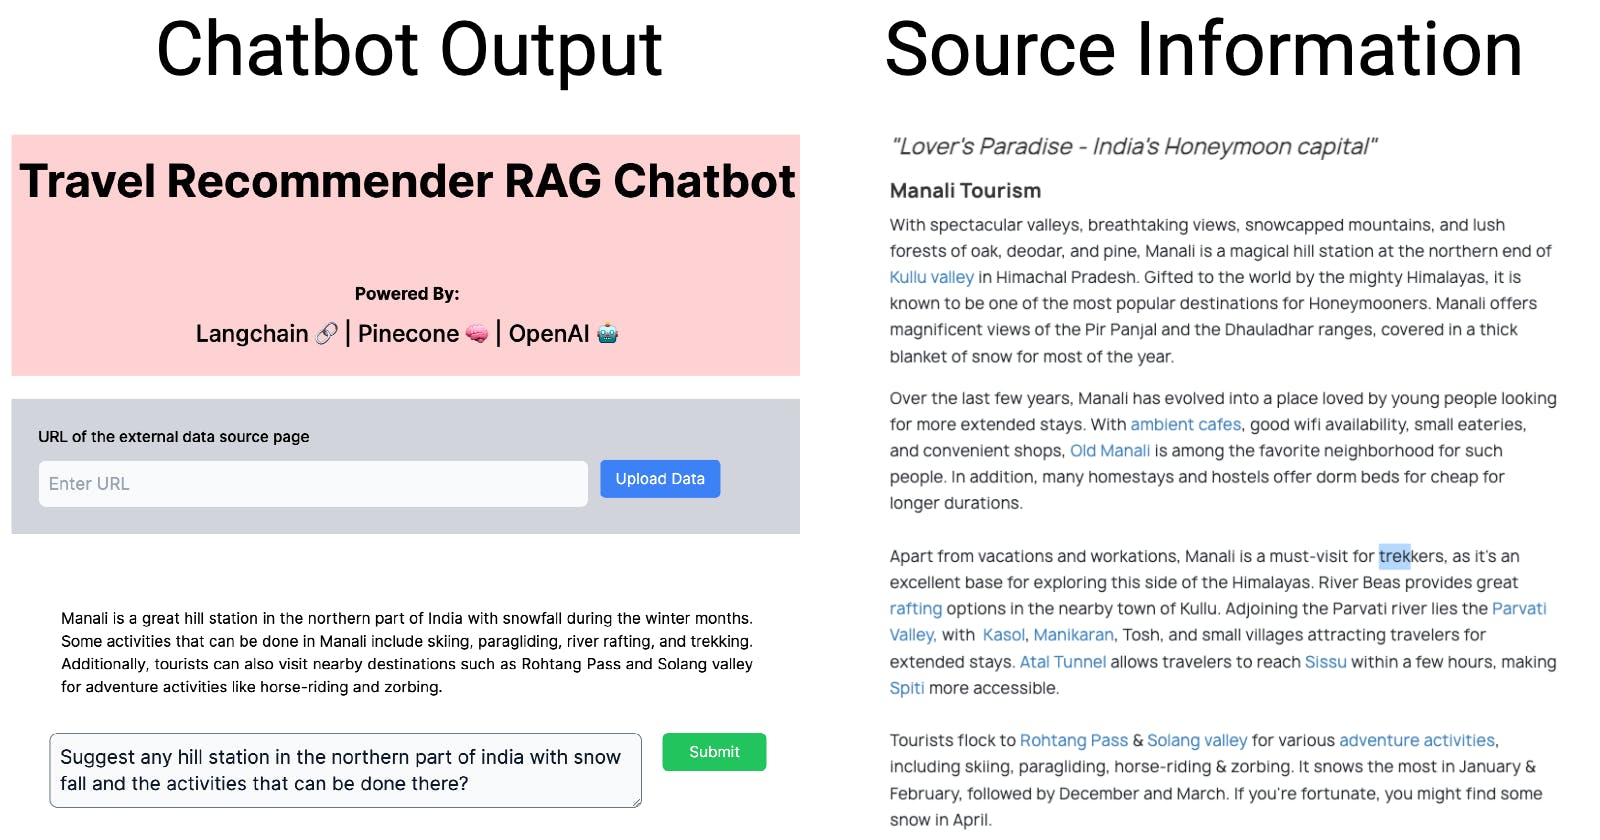
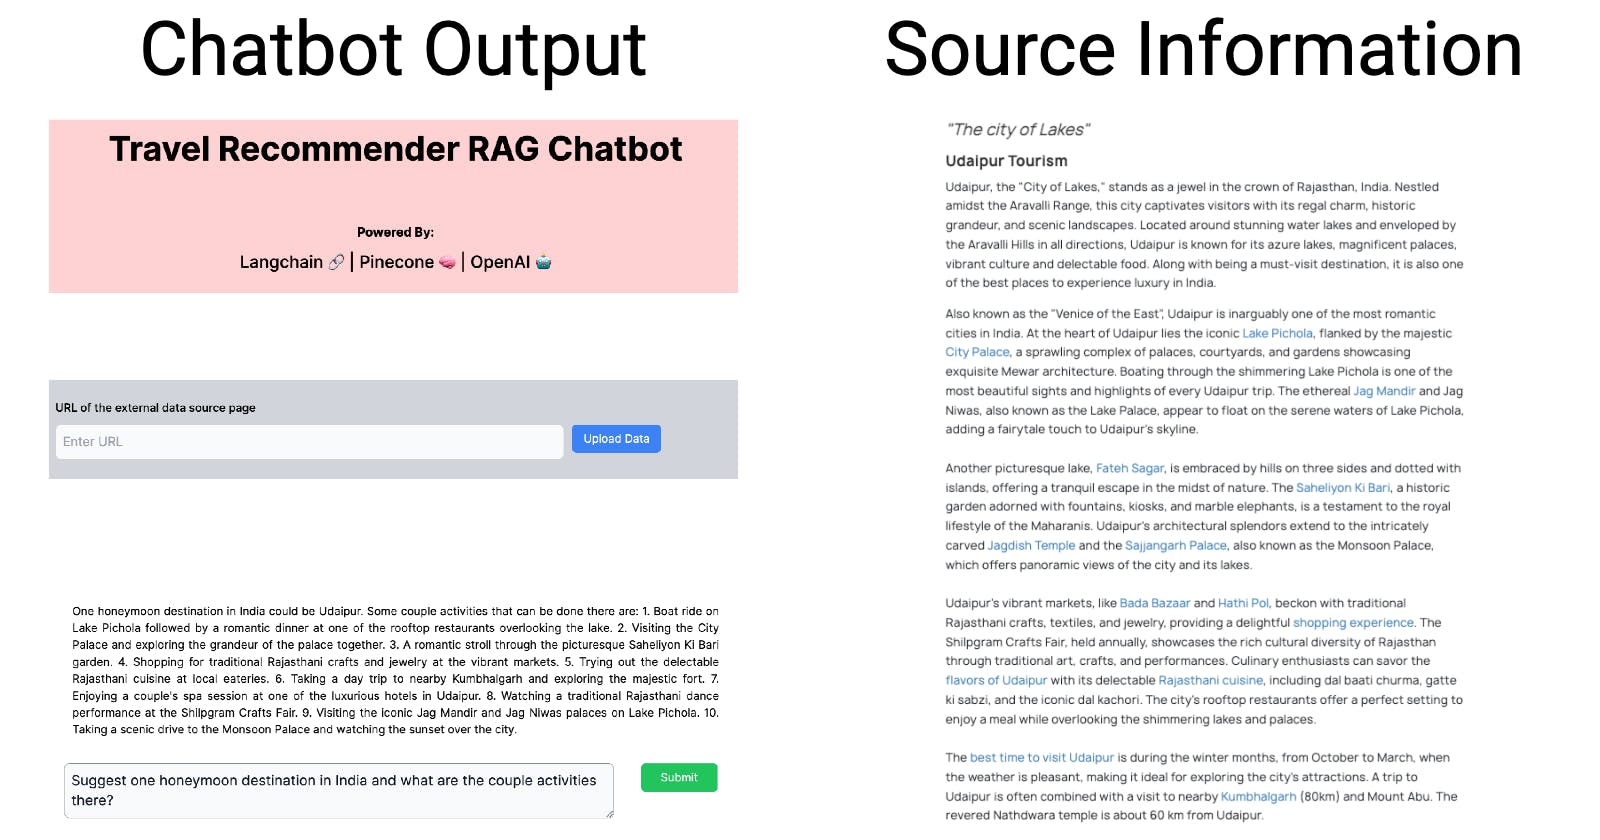
Once the application gathers sufficient information about various tourist destinations, it can begin suggesting destinations according to the user's query. Here, I've provided three examples to demonstrate how our application performs with recommendations post inserting multiple destinations. On the left-hand side of the image I have posted the screenshot of the chatbot output and on the right-hand side I have posted the screenshot of the actual source.
Example 1
Example 2
Example 3
Now that we have an idea of how our application functions let's get deeper into it and see how it works.
RAG Chatbot Internals
Components of the RAG chatbot application
The application is built with Next.js, a React framework for building full-stack web applications.
For embeddings and chat, we are using the OpenAI LLM model.
For storing the external data we are using Pinecone Vector Database.
Dependencies used in the project
The application is built in NextJS and these are the NPM dependencies used:
@pinecone-database/pinecone: The client for Pinecone vectorstore to used by Langchain.
html-to-text: Advanced converter that parses HTML and returns beautiful text.
langchain: Framework for developing applications powered by language models.
puppeteer: Puppeteer provides a high-level API for controlling headless Chrome. We are using it to extract HTML content from dynamic web pages.
tailwindcss: A utility-first CSS framework for rapidly building custom user interfaces.
High Level Design
At a high level, the application consists of two primary components:
Inserting data into the Vectorstore.
Querying Vectorstore with user's question.
For Vectorstore insertion, we have created an endpoint pinecone-insert-data. And for vector store query, we have created a second endpoint pinecone-query-data. Below are the API specifications:
To insert information into Vectorstore, we made an endpoint called pinecone-insert-data. To query Vectorstore, we made another endpoint called pinecone-query-data. Here are the details for using these APIs:
| API Name | HTTP Method | Request Payload |
| /api/pinecone-insert-data | POST | { "url": "<user_submitted_url>" } |
| /api/pinecone-query-data | POST | {"question": "<user_question>" } |
Code Walkthrough
Backend APIs
Here's the API handler for the pinecone-insert-data endpoint. This handler performs two functions: getEntireDivText and uploadDocumentToPinecone. The getEntireDivText function retrieves the main content of the webpage. The scraper function is designed specifically for the holidify.com site, making it effective in extracting content from this site. If you plan to scrape a different site, you might need to adjust this function accordingly. The second function, uploadDocumentToPinecone, does what its name implies—it uploads the scraped content to the Pinecone DB.
import { NextApiRequest, NextApiResponse } from "next";

export default async function handler(
  req: NextApiRequest,
  res: NextApiResponse
) {
  if (req.method != "POST") {
    throw new Error("Method not allowed");
  }

  const userUrl = req.body.url;
  console.log("User url: ", userUrl);

  const options = {
    wordwrap: 130,
  };

  const entireDivText = await getEntireDivText(userUrl, options);

  const metadata = { topic: "travel" };
  uploadDocumentToPinecone(entireDivText, metadata);

  res.status(200).json({ message: "Data Insert Success" });
}
Now, let's explore how the getEntireDivText function is implemented. In this case, we utilized the Puppeteer tool to retrieve the HTML content of the page. Additionally, we used the html-to-text library to parse the HTML and extract the text from it.
const { convert } = require("html-to-text");
import puppeteer from "puppeteer";

const getEntireDivText = async (pageUrl: string, options) => {
  const divContent = await extractDivContentByClassName(
    pageUrl,
    "readMoreText"
  );
  const divContentText = convert(divContent, options);
  console.log(divContentText);
  return divContentText;
};

// Extract the content of the div with the given class name
// from the website.
const extractDivContentByClassName = async (
  pageUrl: string,
  className: string
) => {
  const browser = await puppeteer.launch({
    headless: true,
  });

  // Open a new page
  const page = await browser.newPage();

  // On this new page open the website and wait until the
  // DOM content is loaded (HTML is ready)
  await page.goto(pageUrl, {
    waitUntil: "domcontentloaded",
  });

  // Extract the content of the div with the class name 'readMoreText'
  const divContent = await page.$eval(`.${className}`, (div) => div.innerHTML);

  // Close the browser
  await browser.close();

  return divContent;
};
The uploadDocumentToPinecone function is quite simple. Initially, we package the webpage content and metadata using the Document class. Next, we create a Pinecone object, assign the Pinecone index to it, and then use the PineconeStore.fromDocuments function to insert the data into the Pinecone database.
import { Pinecone } from "@pinecone-database/pinecone";
import { Document } from "langchain/document";
import { PineconeStore } from "langchain/vectorstores/pinecone";
import { OpenAIEmbeddings } from "langchain/embeddings/openai";

const uploadDocumentToPinecone = async (pageContent: string, metadata) => {
  const document = new Document({
    pageContent: pageContent,
    metadata: metadata,
  });

  const pinecone = new Pinecone({
    apiKey: process.env.PINECONE_API_KEY,
    environment: process.env.PINECONE_ENVIRONMENT,
  });

  const pineconeIndex = pinecone.Index(process.env.PINECONE_INDEX);

  await PineconeStore.fromDocuments([document], new OpenAIEmbeddings(), {
    pineconeIndex,
  });

  console.log("Document uploaded to Pinecone successfully");
};
Next, we will look at the API handler for the pinecone-query-data endpoint. Here also we create a Pinecone object and assign the Pinecone index to it. We then use the VectorDBQAChain.fromLLM function which internally queries the Pinecone database and sends the retrieved document to OpenAI along with the Query to generate the answer to the user's question.
import type { NextApiRequest, NextApiResponse } from "next";
import { Pinecone } from "@pinecone-database/pinecone";
import { PineconeStore } from "langchain/vectorstores/pinecone";
import { OpenAIEmbeddings } from "langchain/embeddings/openai";
import { OpenAI } from "langchain/llms/openai";
import { VectorDBQAChain } from "langchain/chains";

export default async function handler(
  req: NextApiRequest,
  res: NextApiResponse
) {
  if (req.method !== "POST") {
    throw new Error("Method not allowed");
  }

  const userQuestion = req.body.question;
  console.log("User question: ", userQuestion);

  const pinecone = new Pinecone({
    apiKey: process.env.PINECONE_API_KEY,
    environment: process.env.PINECONE_ENVIRONMENT,
  });

  const pineconeIndex = pinecone.Index(process.env.PINECONE_INDEX);

  const vectorStore = await PineconeStore.fromExistingIndex(
    new OpenAIEmbeddings(),
    { pineconeIndex }
  );

  const model = new OpenAI();
  const chain = VectorDBQAChain.fromLLM(model, vectorStore, {
    k: 2,
    returnSourceDocuments: true,
  });
  const response = await chain.call({ query: userQuestion });
  console.log(response);

  res.status(200).json({ message: response.text });
}
Environment Setup
To use OpenAI and PineCone, you must configure the OPENAI_API_KEY and PINECONE_API_KEY in the .env file. Additionally, set the values for PINECONE_ENVIRONMENT and PINECONE_INDEX. Here is an example of how the .env file should be configured.
OPENAI_API_KEY=<openai_api_key>
PINECONE_API_KEY=<pinecone_api_key>
PINECONE_ENVIRONMENT=<pinecone_project_env_name>
PINECONE_INDEX=<pinecone_project_index_name>
Frontend UI Code
The code for the UI which is shown in the earlier section of the blog can be found below.
"use client";
import { FC, ReactElement, useState, ChangeEvent } from "react";

export const TravelRecommenderRag: FC = (): ReactElement => {
  const [userUrl, setUserUrl] = useState<string>("");
  const [userQuestion, setUserQuestion] = useState<string>("");
  const [aiAnswer, setAiAnswer] = useState<string>("");

  const handleUserUrlChange = (event: ChangeEvent<HTMLInputElement>) => {
    setUserUrl(event.target.value);
  };

  const handleUserQuestionChange = (event: ChangeEvent<HTMLInputElement>) => {
    setUserQuestion(event.target.value);
  };

  const fetchWebpageData = async (e) => {
    console.log(
      "Calling pinecone-insert-data API to scrape webpage data and insert to DB"
    );
    const res = await fetch("/api/pinecone-insert-data", {
      method: "POST",
      headers: {
        "Content-Type": "application/json",
      },
      body: JSON.stringify({ url: userUrl }),
    });
    const data = await res.json();
    console.log(data);
  };

  const queryPinecone = async (e) => {
    console.log(
      "Calling pinecone-query-data API to get the answer of user queries."
    );
    const res = await fetch("/api/pinecone-query-data", {
      method: "POST",
      headers: {
        "Content-Type": "application/json",
      },
      body: JSON.stringify({ question: userQuestion }),
    });
    const data = await res.json();
    setAiAnswer(data.message);
    console.log(data);
  };

  return (
    <div className="flex min-h-screen flex-col items-center justify-between py-10 bg-white max-w-screen-lg mx-auto border-2">
      <div className="flex flex-col items-center justify-center bg-red-300 w-full h-64 bg-opacity-50">
        <h1 className="text-5xl font-bold mb-10">
          Travel Recommender RAG Chatbot
        </h1>
        <p className="mt-10 text-black-500 font-bold text-lg">Powered By:</p>
        <p className="text-black-500 font-medium text-2xl mt-3">
          Langchain 🔗 | Pinecone 🧠 | OpenAI 🤖
        </p>
      </div>
      <div className="grid gap-3 m-6 grid-cols-4 w-full p-7 bg-gray-300">
        <div className="col-span-4">
          <p className="font-medium">URL of the external data source page</p>
        </div>

        <div className="col-span-3">
          <input
            type="text"
            id="user_url"
            className="bg-gray-50 border border-gray-300 text-gray-900 text-lg rounded-lg focus:ring-blue-500 focus:border-blue-500 p-2.5 w-full"
            placeholder="Enter URL"
            onChange={handleUserUrlChange}
            value={userUrl}
          />
        </div>

        <div className="col-span-1">
          <input
            type="button"
            className="rounded-md bg-blue-500 py-2 px-4 text-white"
            value="Upload Data"
            onClick={fetchWebpageData}
          />
        </div>
      </div>

      <div className="grid mb-20 gap-6 grid-cols-6 w-full p-10 bg-white h-64">
        <div className="col-span-6">
          <div className="selection:bg-fuchsia-300 selection:text-fuchsia-900">
            <p className="m-3 text-black-500 text-justify">{aiAnswer}</p>
          </div>
        </div>

        <div className="col-span-5">
          <textarea
            id="message"
            value={userQuestion}
            onChange={handleUserQuestionChange}
            rows={2}
            className="block p-2.5 w-full text-sm text-gray-900 bg-gray-50 rounded-lg border border-gray-500 text-xl focus:ring-blue-500 focus:border-blue-500"
            placeholder="Write your query here"
          ></textarea>
        </div>

        <div className="col-span-1">
          <div className="flex items-center justify-center w-full">
            <input
              type="button"
              className="rounded-md bg-green-500 py-2 px-7 text-white"
              value="Submit"
              onClick={queryPinecone}
            />
          </div>
        </div>
      </div>
    </div>
  );
};

export default TravelRecommenderRag;
The entire above code can be found in this Repo (Branch Name: travel-recommendation):
https://github.com/ritobrotos/nextjs-langchain-projects/tree/travel-recommendation
I trust this blog helped explain how to build RAG chatbots using Pinecone, Langchain and OpenAI. If you have any questions regarding the topic, please don't hesitate to ask in the comment section. I will be more than happy to address them. I regularly create similar content on Langchain, LLM, and AI topics. If you'd like to receive more articles like this, consider subscribing to my blog.
If you're in the Langchain space or LLM domain, let's connect on Linkedin! I'd love to stay connected and continue the conversation. Reach me at: linkedin.com/in/ritobrotoseth